Space
- Insert a Space
- Space: from curve
- Space: from planar surface
- Modify a space
- Control points
- Insert options and parameters
The space object represents the surface entity that displays the information (name, area, perimeter, etc.) of a space or room with a hatch pattern and a label.
Spaces can be created in three different ways:
- From points
- From curves
- From surfaces
Space from points
This option inserts a space by picking a point inside a room. A room is defined as any closed space delimited by spatial elements on all four sides.
Spatial elements are walls, curtain walls, columns and any other geometry entity that has been set as spatial element with the vaSpatialElementSet command. Walls and columns can be at different elevations, provided that they are part of the same floor.
After running the vaSpace command:
Steps:
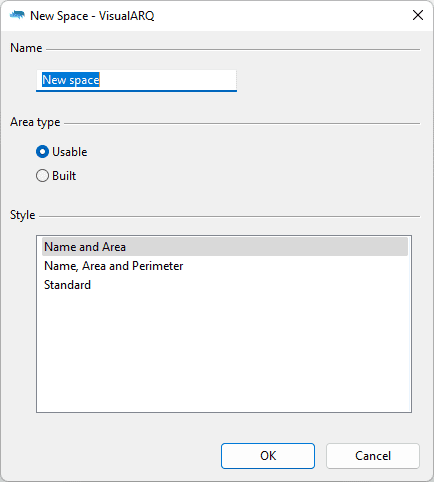
- Left click inside the room for which you wish to calculate the area. The Space Insert dialog will appear:
- Select the Space parameters:
- Name
- Area type: Usable or Built
- Style
- Click OK to close the dialog and pick a new point to insert a new Space or do right click to end the command.

Space insert dialog box
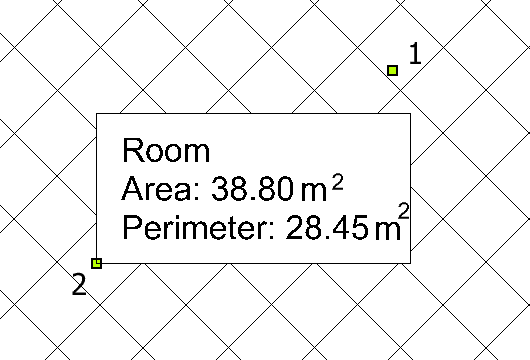
A hatch pattern is inserted in the room marking the occupied area, with a label containing the space name and its geometric features.
You can create as many spaces as you wish and you can cancel the command by pressing ENTER or ESC.
Note 1When the values in the Space label are 0, it means the room was not totally delimited by spatial elements and therefore its area can't be calculated.
Note 2The spaces created from insert points can be moved manually with the cursor inside other rooms. They can also be updated after making a change in their original spatial elements with the vaUpdate command
.
Space from curve
Spaces from curves are created from existing curves in the model.
Steps:
- Select a closed and planar curve in the model. The Space Insert dialog will appear:
- Select the Space parameters:
- Name
- Area type: Usable or Built
- Style
- Click OK to close the dialog and pick a new point to insert a new Space or do right click to end the command.
Space from planar surface
Spaces from surfaces are created from existing planar surfaces in the model.
Steps:
- Select a planar surface in the model. The Space Insert dialog will appear:
- Select the Space parameters:
- Name
- Area type: Usable or Built
- Style
- Click OK to close the dialog and pick a new point to insert a new Space or do right click to end the command.
Modify a space
A space can be modified with the vaSpaceSetContour command in three different ways:
- Select the space you wish to modify.
- Select a new point (inside a room) to insert the space, or select one of the command options displayed in the command line: FromCurve or FromPlanarSurface.
The space is modified while maintaining its properties.
Control points 

Spaces have two control points:
- Insertion point that marks the space location. This point will detect the surrounding spatial elements.
- Label control point. It is used to only move the label to a new position.
To move a space to a new room, select the space (hatch pattern or label) and drag it to the new room. The insertion point will determine the location of the space.
NoteSpaces created from curves or surfaces don't have the insertion point #1, but have the same control points as the input geometry. They can be used to modify the space boundary.
Control points on this object are enabled in the same way as on any other object in Rhino. More details.
- Use the vaProperties command, then select a Space and press Enter, or
- Click on
 ,
then select a Space and press Enter, or
 - Select a Space and open the context menu by pressing the right mouse button for a while then select Space > Properties, or,
- Double click on a Space object.
Insertion options and parameters
All the space insertion options and parameters can be edited in the Object Properties
dialog box  or in the VisualARQ Properties section (in Rhino Properties
Panel
  ).
).
General
- Name, Description and Style. The name is used to distinguish it from other spaces and it is shown in the space label.
Area type
There are two types of space areas:
- Usable: Area occupied by a room (or building), excluding the thickness of walls.
- Built: Area delimited by the outer limits of the plan construction.
To modify the area type of a space, delete the space and create a new one, selecting the desired area.
Geometry
Area, volume and perimeter of the space.
- Height: the space takes by default the height of the level where it is inserted (3 meters when there are only one or no levels). This value can be taken by Level or edited individually for each space object.
 left click
[

 left click
 left click