Wall Styles
The wall style defines the wall features. The following parameters can be specified for each style: Name, Attributes, Geometry and Wrapping.
Wall styles are defined by different Wall Layers that can be added or deleted at any time.

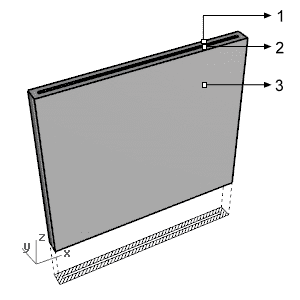
Wall style composed by 3 layers:
 Wall layer A
 Wall layer B
 Wall layer C
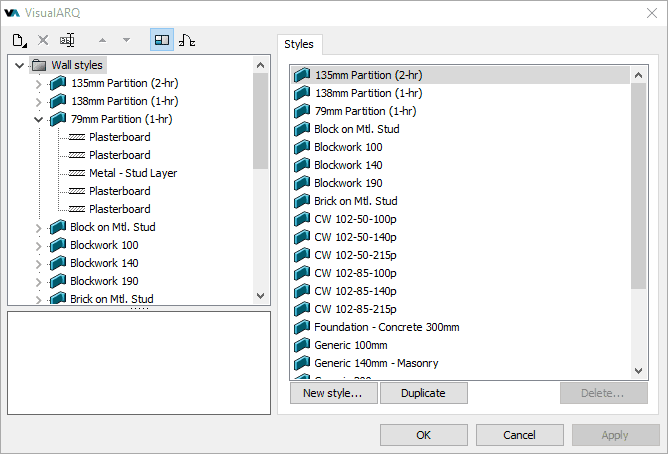
After running the vaWallStyles command, the wall Style Manager dialog box will appear. All wall styles are created and edited from this dialog.

Wall Style Manager dialog box
New wall style:
You can create new styles and duplicate existing ones from the different options in the wall Style Manager.
Wall styles can be created as regular wall styles, or as Grasshopper styles (styles driven by a Grasshopper definition).
When clicking on the New Style... button, select one of the two options available, which will open the corresponding new style wizard:
- Wall style: follow the steps of the wizard to define the new wall style parameters:
- Name
- Number of layers
- Layer parameters
- Wall height
- Grasshopper style: follow the steps of the wizard to create a new style from a Grasshopper definition:
- Grasshopper definition
- Global values configuration
- Geometry
- Parameters
Delete a wall style:
You can delete wall styles from the wall Style Manager dialog box. You can only delete those styles that are not being used by any existing wall in the model.
- Use the vaStyleProperties command, then select a wall and press Enter, or
- Right click on
 ,
then select a wall and press Enter, or
 - Select a wall and open the context menu by pressing the right mouse button for a while then select Wall > Style Properties, or
- Press Alt, Shift or Ctrl then double click on a wall object.
Edit a wall style:
Select the wall style or a wall layer from the top left panel and edit their different parameters from the tabs that appear in the right panel.
In the case of Grasshopper styles, do right-click on the style name to see the Context menu and select Edit, which will launch the Grasshopper style wizard.
Add a new wall layer
- Context menu: right-click on the wall style name to open the context menu and select New > Wall layer.
- New icon
 : select the wall style and click on the New icon from the dialog toolbar. Select Wall layer.
Delete layers: use the context menu (right-click on the component
you wish to delete and select Delete) or the Delete button ![]() .
.
Attributes
Attributes define the features of each wall style and its layers for display and print purposes. Check the list of attributes available.
NoteThe layers of different walls that have the same hatch pattern assigned, merge in wall intersections. The non-consecutive layers of the same wall object that have the same hatch pattern also merge if they meet at wrappings.
Geometry
Height: defines the wall height by style. Walls can have a different height by object and by wall layer.
Thickness: this value shows the sum of the wall style layers thicknesses. To modify it, you need to modify the thicknesses of each layer. Walls can have different thicknesses by object and by wall layer.
Wrapping
The wall wrapping is defined by how the wall layers finish at the end caps of a wall, and at their encounter with openings (windows, doors and openings). Wrapping affects only walls composed by 3 or more layers and is visible from the Top viewport, when the plan view mode is enabled.
There are 3 types of wall wrapping by style for the wall end caps and for the encounter with openings:
- None: Wall with no wrap (at openings and end caps).
- Exterior: Wall exterior layers wrap at end caps and/or openings.
- Interior: Wall interior layers wrap at end caps and/or openings.

1. Wall wrapping: None.

2. Wall wrapping: Exterior.

3. Wall wrapping: Interior.
Parameters
In this tab you can create custom parameters by style and assign values by style.
These values can be overwritten by object, from the Parameters section  , in the Rhino Properties panel
  .
.
Wall components
Layers 
Wall styles can have multiple Layer components. In the layer list, the first one corresponds to the inner layer, and the last one to the outer layer. You can change that order with the Up and Down arrows in the Style dialog toolbar.

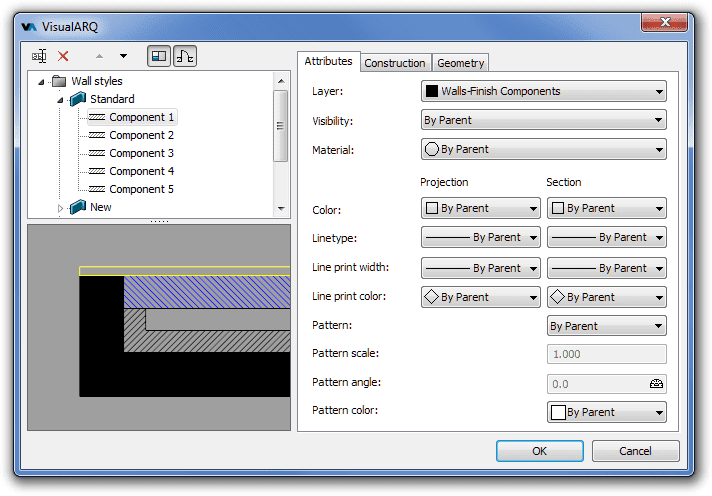
Attributes tab for Layer 1 of Standard wall style, in Wall styles dialog
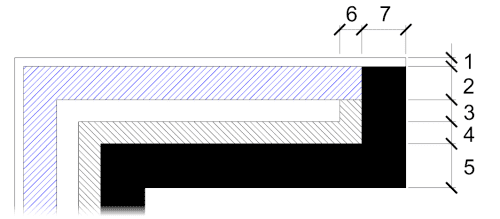
See the following example of a 5-layer wall style with exterior wrapping at the wall cap ends:

- Interior layer 1 (i.e. Stucco)
- Layer 2 (i.e. Brick)
- Layer 3 (i.e. air chamber)
- Layer 4 (i.e. insulation layer)
- Exterior layer 5 (i.e. brick)
- Layer 4 wrap
- Layer 5 wrap
Geometry
Thickness: this value is a property of the wall style that is edited by each wall layer. However, it can be also edited for each layer of a wall object individually.
Elevation offsets: these values are properties of the wall style that are edited by each wall layer. However, they can be also edited for each layer of a wall object individually.
- Top: changes the height of the wall layer from the upper part.
- Bottom: changes the height of the wall layer from the lower part.
Construction
Type: There are two types of wall layers which establish the order of connection with each other:
- Core: layers with priority number 1. Core layers are meant to be the structural ones in a wall, so they will tend to connect with each other.
- Normal: layers with priority number 2. They tend to connect with other Normal layers after the Core layers are connected. They can also be wrapped around Core layers, depending on their wrapping settings.
Function: There are 5 types of function specifications that can be assigned to wall layers. These functions are for information only.
- None
- Structure
- Isolation
- Finish
- Decoration
Wrapping: There are four options available to define the wrapping of wall layers:
- None: No wrap is created.
- Ends: The layer wraps at the ends of the wall.
- Openings: the layer wraps at the encounter with a door, a window or an opening.
- Ends and Openings: the layer wraps at the ends of a wall and at the encounter with doors, windows or openings
NoteNote: Wall layers that are Core type can't wrap.
 right click
[