Column Styles
 right click
[left click]
The column style defines the column features. You can define the following parameters for each column style: Name, Attributes, Shape (geometry) and Sizes.
The column styles are defined by a Coating component that can be added or deleted at any time.

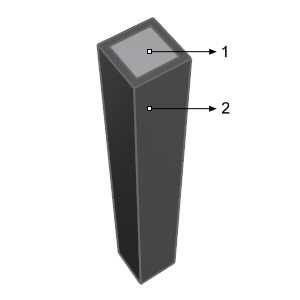
Column and its coating component:
- Column
 Coating
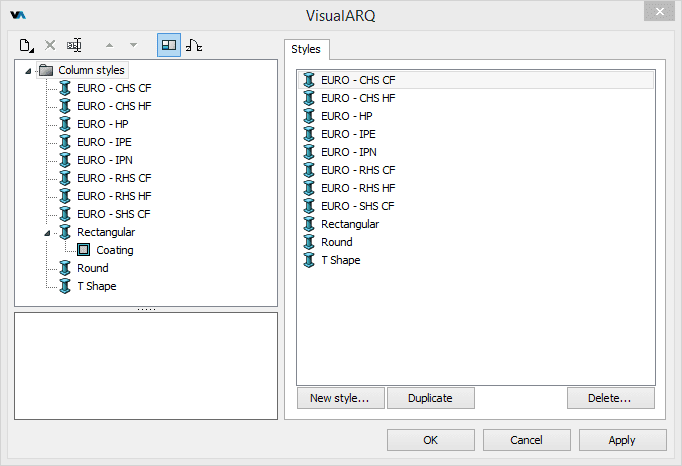
After running the vaColumnStyles command, the column Style Manager dialog box will appear. All column styles are created and edited from this dialog.

Style Manager dialog box for the column object
New column style:
You can create new styles and duplicate existing ones from the different options in the column Style Manager.
Column styles can be created as regular column styles, or as Grasshopper styles (styles driven by a Grasshopper definition).
When clicking on the New Style... button, select one of the two options available, which will open the corresponding new style wizard:
- Column style: follow the steps of the wizard to define the new column style parameters:
- Name
- Column profile
- Standard size
- Coating component parameters
- Custom blocks
- Grasshopper style: follow the steps of the wizard to create a new style from a Grasshopper definition:
- Grasshopper definition
- Global values configuration
- Geometry
- Parameters
Delete a column style:
You can delete column styles from the column Style Manager dialog box. You can only delete those styles that are not being used by any existing column in the model.
- Use the vaStyleProperties command, then select a column and press Enter, or
- Right click on
 ,
then select a column and press Enter, or
 - Select a column and open the context menu by pressing the right mouse button for a while then select Column > Style Properties, or
- Press Alt, Shift or Ctrl then double click on a column object.
Edit a column style:
Select the column style or the column component item at the top left panel, and edit their different parameters from the tabs that appear in the right panel.
Add a new column component:
- Context menu: do right-click on the column style name to open the context menu, and select New > "Component item".
- New icon
 : select the column style and click on the New icon, from the dialog toolbar. Select "Component item".
Delete components: use the Context menu (right-click on the component to delete and select Delete) or the Delete button ![]() .
.
Attributes
Attributes define the features of each column style and its components for display and print purposes. Check the list of attributes available.
Geometry
Shape: the column shape is defined by a profile.
VisualARQ offers a library with the main standard European and North American profiles.
Height: defines the column height by style. Columns can have a different height by object.

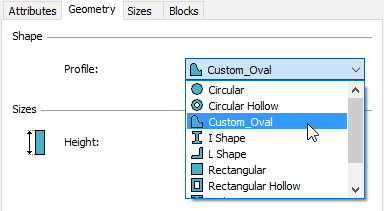
Profile selection, in the Columns style dialog, Geometry tab
Customized shape profiles can also be used to define Columns.
To add a customized profile, draw a closed and flat curve and convert it into
a profile using the vaProfileFromCurve command
 .
.
Once the custom profile has been created, it will appear at the end of the list of preset parametric profiles library.
The resulting profile is not parametric, so it can only be used with the dimensions and proportions of the original drawing.
Sizes
The parameters corresponding to the column sizes will vary in accordance with the type of profile selected. You can specify different sizes for the same column style.
The sizes can be specified at any time when inserting the column from the insert dialog box by choosing the Sizes > Other option in the Profile section of this panel.
Parameters
In this tab you can create custom parameters by style and assign values by style.
These values can be overwritten by object, from the Parameters section  , in the Rhino Properties panel
  .
.
Column components
Coating 
Columns can have a coating.
The only property of the coating is its thickness, that can be edited under the Geometry tab.
To add a coating to a column that hasn't any, select the column style on the left side of the dialog box, right-click to open the context menu or click on the New icon from the dialog toolbar, and select New > Coating.
Column from custom blocks
Column styles can be created with 2D and 3D blocks that define their representation in plan and model views, respectively.
Steps:
- Create the 2D and 3D blocks: Create the 3D model and draw the 2D representation from it. Then, create two blocks from them with the Block command (Edit menu > Blocks > Create Block Definition).
- Assign the 2D and 3D blocks to a new or to an existing column style, in the column styles dialog:
- New style wizard: press the New style... button in the Style Manager dialog box. Skip the steps where the column style parameters are defined by pressing the Next button until the custom block definition dialog box is displayed. Select the checkbox that enables the options to use custom blocks for the model and plan views in the Custom blocks dialog box. Once they have been enabled, select the 3D and 2D blocks in the drop-down menu to define the column style representation in those views.
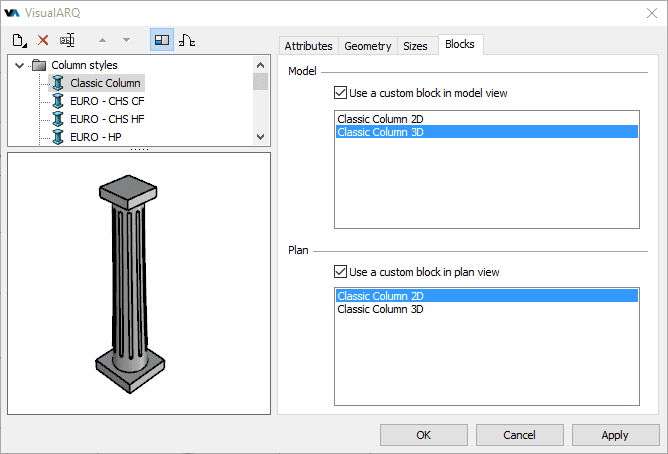
- Existing column style: select the column style from the top-left styles list and assign the 3D and 2D blocks from the Blocks tab.

Style Manager dialog box for the Column object, Blocks tab.
The checkboxes to assign 3D and 2D blocks will only be enabled if there is a block created in the document.
When a column style only has a block assigned for its 3D representation, the 2D representation will take the real block section according to the level cut plane height where the column is situated.
When a column style only has a block assigned for its 2D representation, the 3D representation will take the column style parameters.
